이 모듈에서는 Microsoft Azure Sentinel(Cloud-Native SIEM 및 SAWM)을 살펴보기로 한다. SIEM을 구축하는 방법을 처음부터 익히고 SIEM으로 위협 탐지 작업을 시작하는 방법을 알아보십시오.

아즈레 센티넬의 사용법을 배우기 전에 먼저 정의해야 한다. 그들의 공식 블로그 게시물 중 하나에 따르면:
Azure Sentinel은 전사적으로 클라우드 규모에 맞는 지능형 보안 분석 기능을 제공한다. Azure Sentinel은 모든 클라우드의 서버에서 기기, 사용자, 앱, 서버에 이르기까지 전체 하이브리드 조직에서 보안 데이터를 쉽게 수집할 수 있도록 한다. 인공지능(AI)의 힘을 활용해 실제 위협을 신속하게 파악하고, 인프라 구축, 유지, 확장에 시간을 할애할 필요가 없어 기존 SIEM의 부담에서 벗어나게 한다.
대부분의 첫 단계는 이전 자원의 세부사항에서 이미 논의되고 있다. 따라서 나는 빠른 속도로 단계를 진행할 것이다.
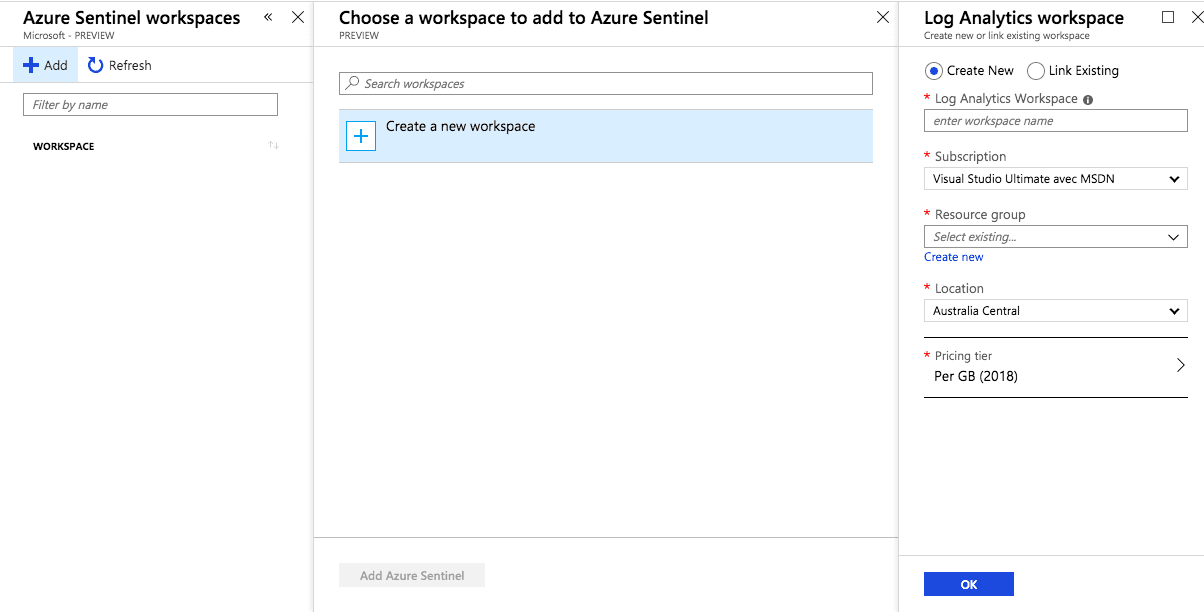
Azure 검색 표시줄로 이동하여 Azure Sentinel(사전 보기)을 찾고 새 작업영역을 추가하십시오.

새 작업영역을 만들고 "확인"을 누르십시오.

새 Azure Sentinel 추가

짜잔!

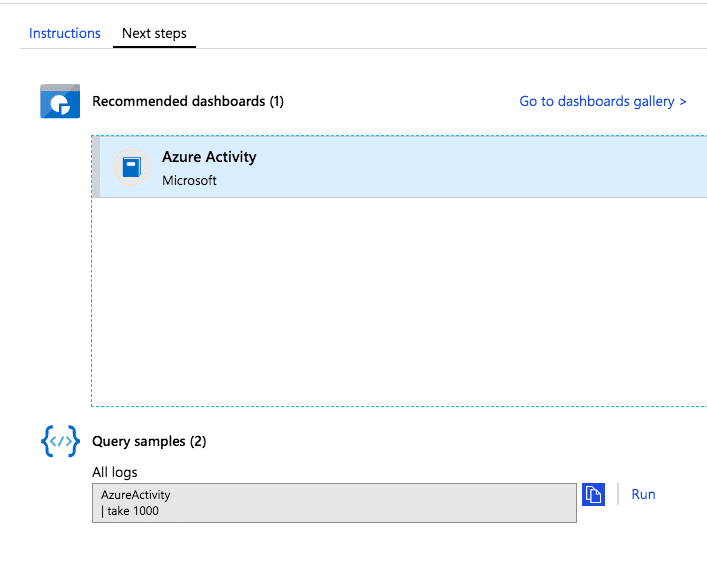
이제 로그를 수신할 커넥터를 선택해야 함:

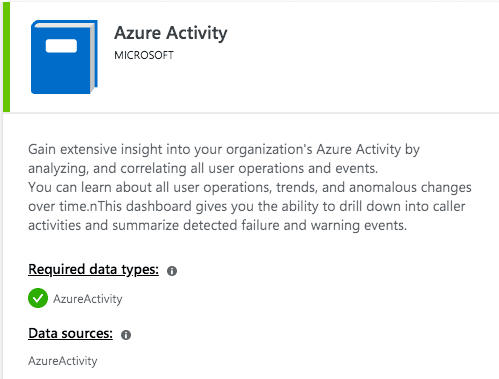
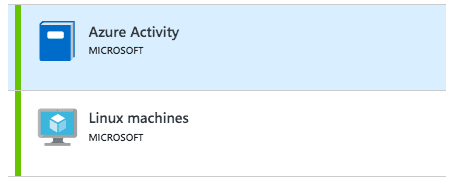
예를 들어 Azure Activities를 선택할 수 있다.

"다음 단계" 클릭


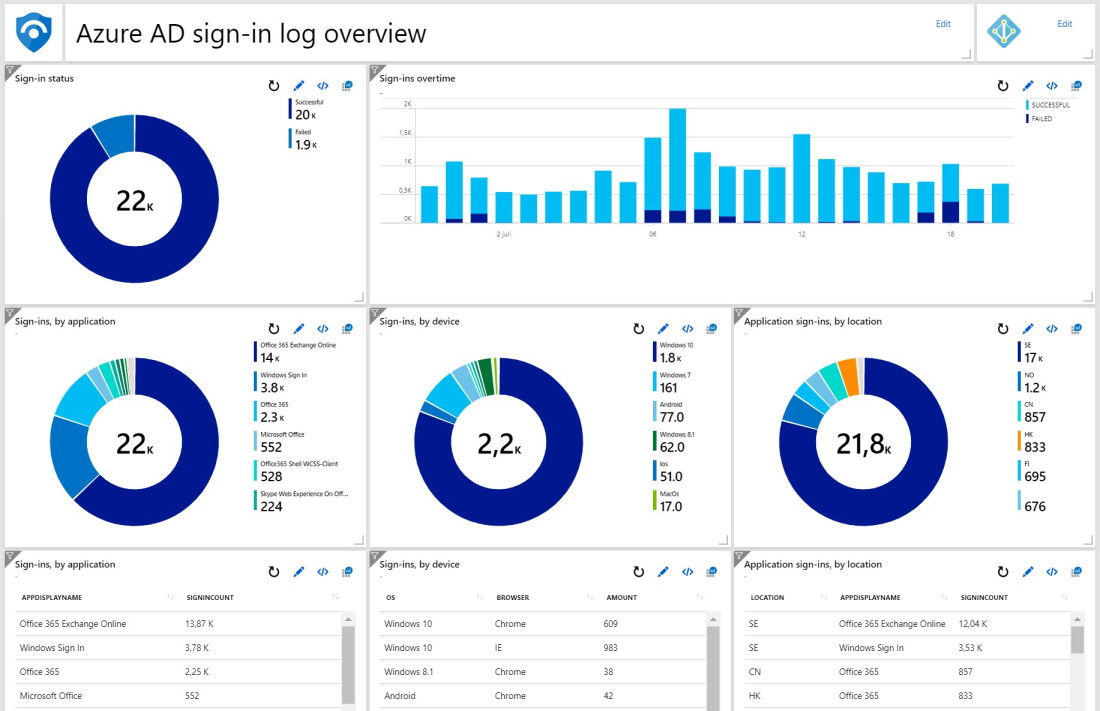
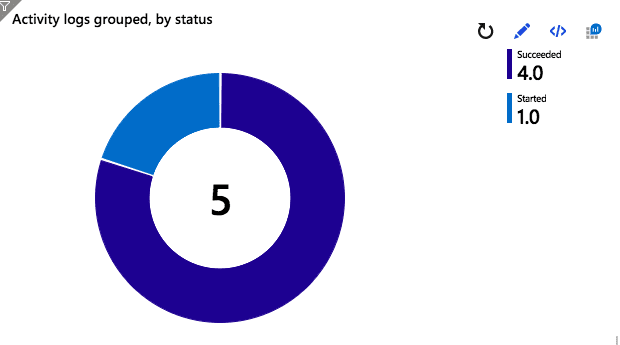
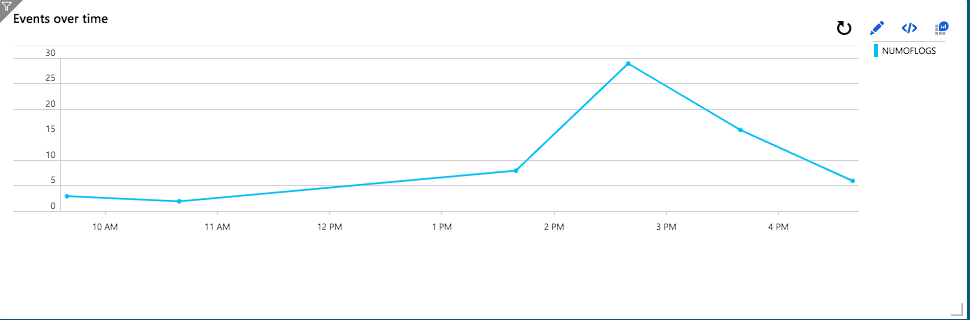
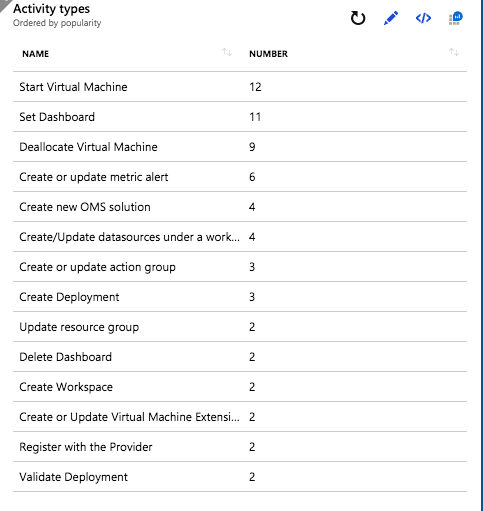
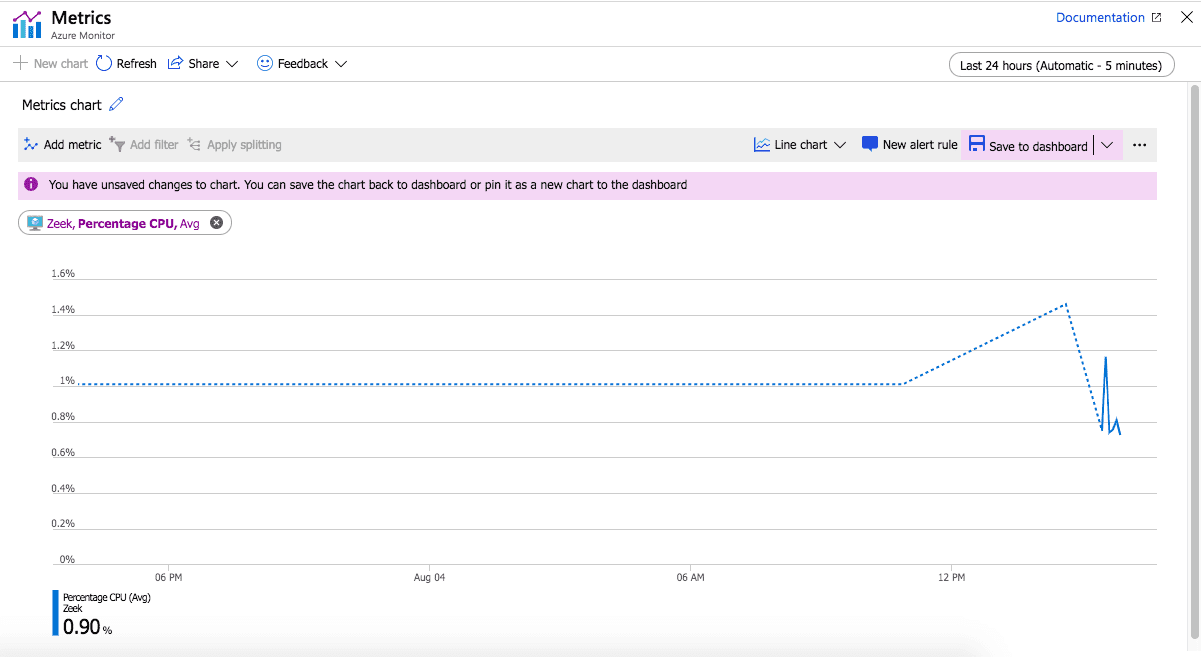
대시보드를 만드십시오. 다음 그래프는 대시보드 구성 요소의 일부를 보여 준다.


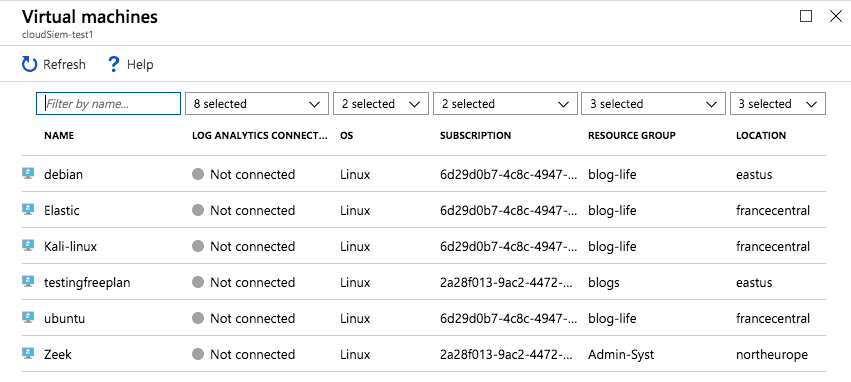
Azure VM에서 로그를 수신하려면 Syslog Connector를 선택하고 사용할 VM을 선택하십시오.
예를 들어 "Zeek" VM에서 Linux 에이전트 배포

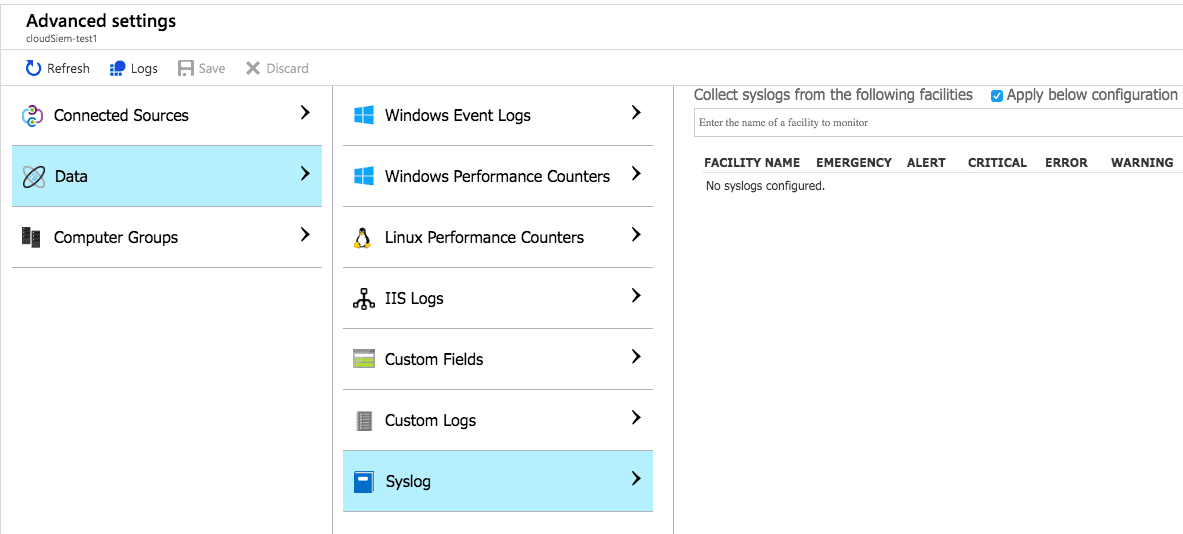
"고급 설정" - \> Data - \> Syslog - \> 아래 구성을 내 컴퓨터에 적용
그리고 이제 Linux Machine에 연결됨

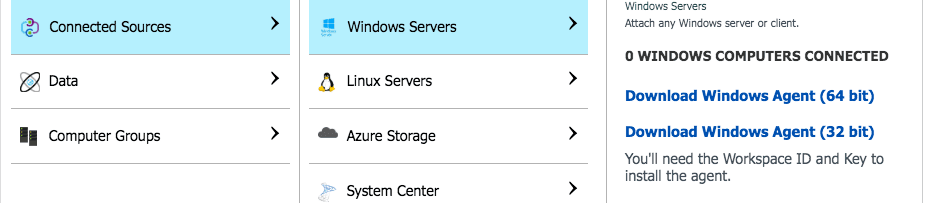
윈도우즈 시스템에서 로그를 수신하려는 경우: 고급 설정 - \] 연결된 소스로 이동하고 "Windows 서버"를 선택하십시오. 그런 다음 윈도우즈 에이전트 설치 이진 파일을 다운로드하십시오.

윈도우즈 시스템(내 경우 윈도우즈 7 x32 )을 열고 에이전트를 설치하십시오. 다음 클릭

ID 및 키 추가(Windows Server 대시보드에서 찾을 수 있음)

다음을 클릭하면 완료됨

이제 사냥할 시간이다! Sentinel 페이지로 이동하여 Hunting을 선택하면 KQL Azure 쿼리 언어를 사용하여 자신만의 사냥 쿼리를 입력할 수 있다.

자신만의 노트북을 사용하고 만들 수도 있다.

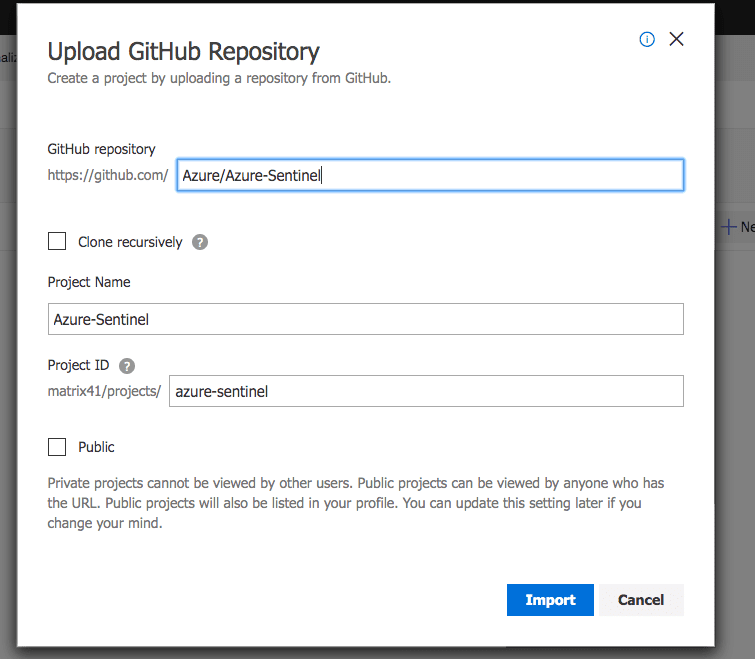
아즈레에서 배달한 미리 만든 사냥 수첩을 사용하면 된다. 가져오기 클릭

공식 Sentinel GitHub 계정에서 직접 업로드하십시오.

Sentinel 대시보드는 사용자 지정성이 매우 높다. 다시 말해 원하는 시각화를 추가하는 것이다. 이 예에서는 CPU 시각화를 추가했다.

경고/탐지 규칙도 추가할 수 있다. 이렇게 하려면 "새 알림 규칙"을 클릭하십시오.
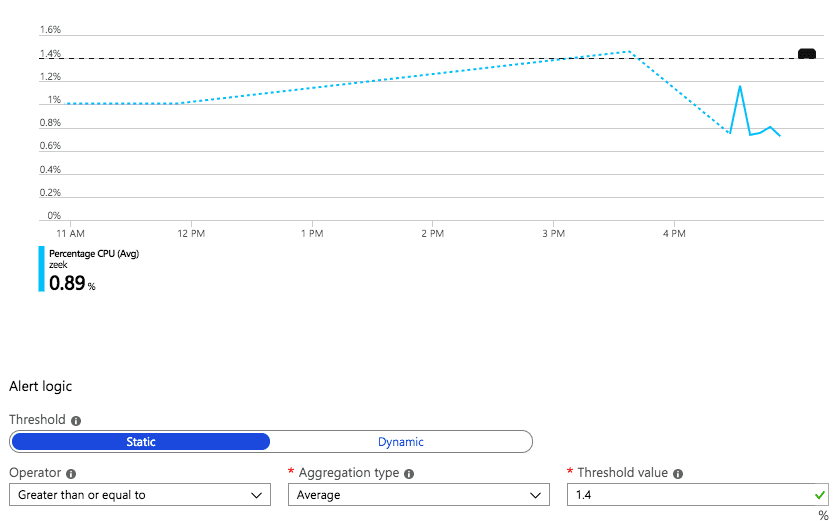

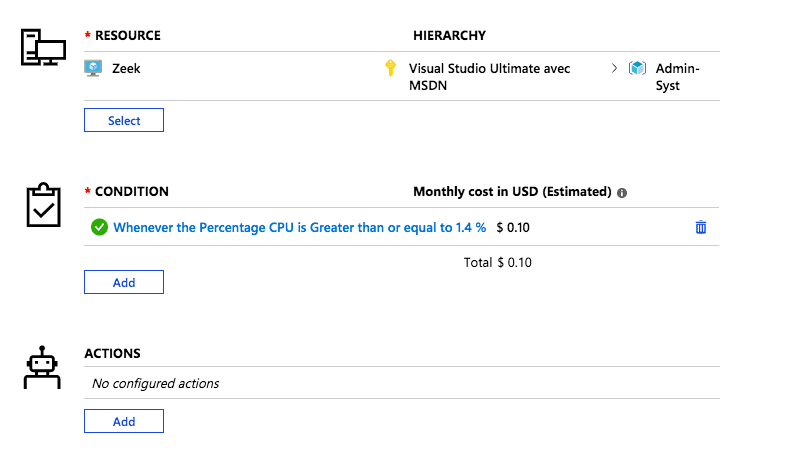
교육목적으로 임의조건 CPU \> 1.4%를 시도했다.

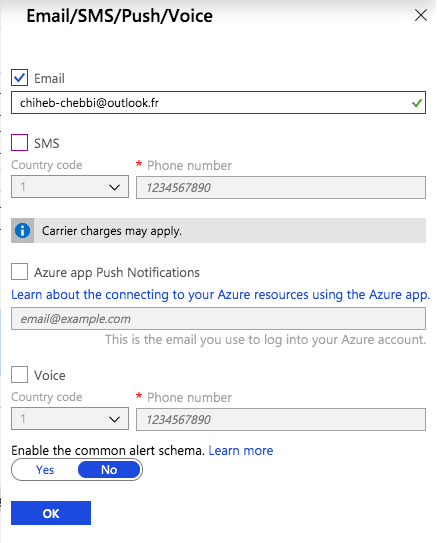
조건이 수행될 때 작업을 선택할 수도 있다. 나의 경우 이메일 알림 옵션을 사용해 보았다.

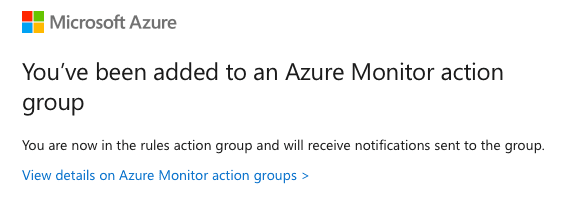
모든 것이 정상인지 확인하기 위한 확인 이메일을 받게 될 것이다.

규칙이 달성되면 e-메일 알림을 받게 됨

KQL로 고급 탐지 쿼리를 직접 작성할 수도 있다. "Hunting"으로 이동한 후 "New Query"를 클릭하여 사용자 지정 쿼리를 생성하면 MITRE ATT&CK 프레임워크와의 연결을 확인할 수 있다.
이제 너는 헌팅 임무를 시작할 준비가 되었다.
Getting started using Microsoft Azure Sentinel (Cloud-Native SIEM and SOAR)
In this module, we are going to explore Microsoft Azure Sentinel (Cloud-Native SIEM and SOAR). We are going to learn how to deploy the SIEM from scratch and we are going to see how to start detecting threats with it
Before learning how to use Azure Sentinel, we need to define it first. According to one of their official blog posts:
Azure Sentinel provides intelligent security analytics at cloud scale for your entire enterprise. Azure Sentinel makes it easy to collect security data across your entire hybrid organization from devices, to users, to apps, to servers on any cloud. It uses the power of artificial intelligence to ensure you are identifying real threats quickly and unleashes you from the burden of traditional SIEMs by eliminating the need to spend time on setting up, maintaining, and scaling infrastructure.
Most of the first steps are already discussed in details in the previous resource. Thus I am going to go through the steps rapidly:
Go to Azure search bar and look for Azure Sentinel (preview) and add a new workplace
Create a new Workspace and press "OK"
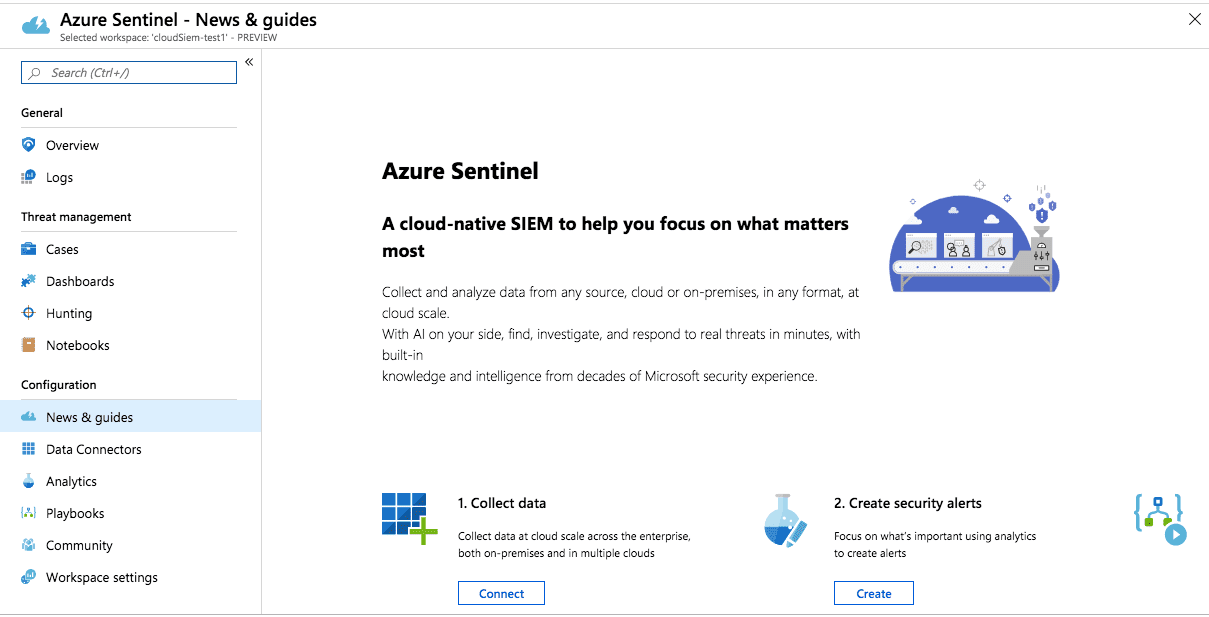
Add a new Azure Sentinel

Voila!
Now you need to select a connector to receive logs:
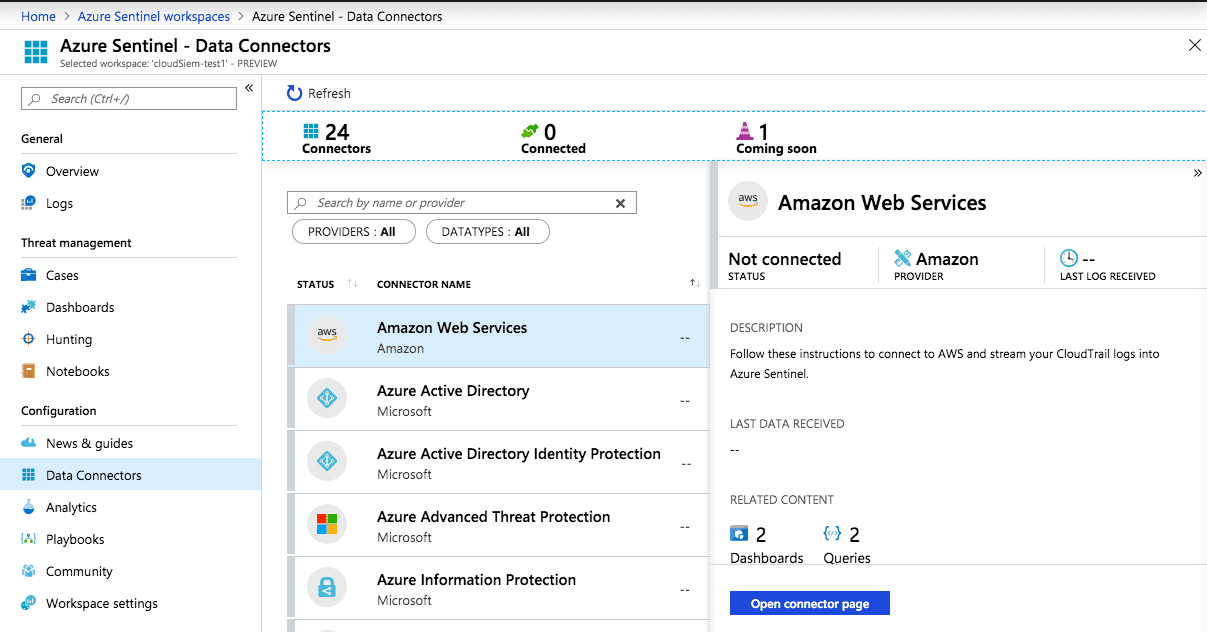
For example, you can select Azure Activities:
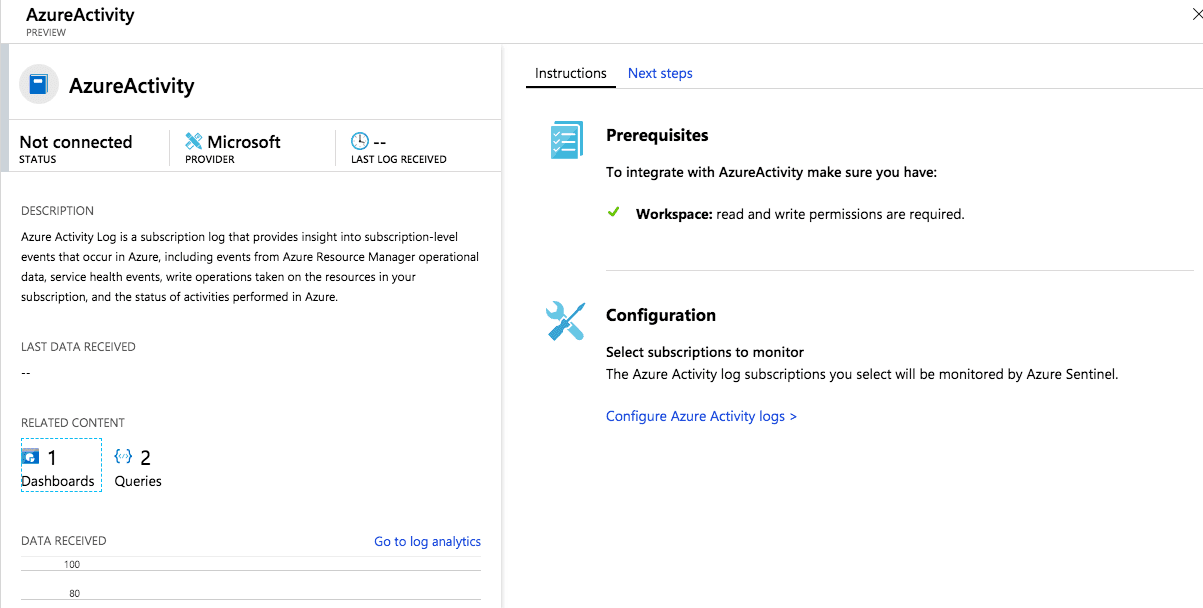
Click "Next Steps"
Create a Dashboard. The following graph illustrates some of the Dashboard components:
If you want to receive logs from an Azure VM you can select the Syslog Connector and pick the VM that you want to use:
Deploy the Linux agent for example in "Zeek" VM
Go to "Advanced Settings" - \> Data - \> Syslog - \> select Apply below configuration to my machines

And now you are connected the Linux Machine
If you want to receive logs from a windows machine: Go to "Advanced Settings" - \> Connected Sources and select "Windows Servers". Then download the Windows agent installation binary
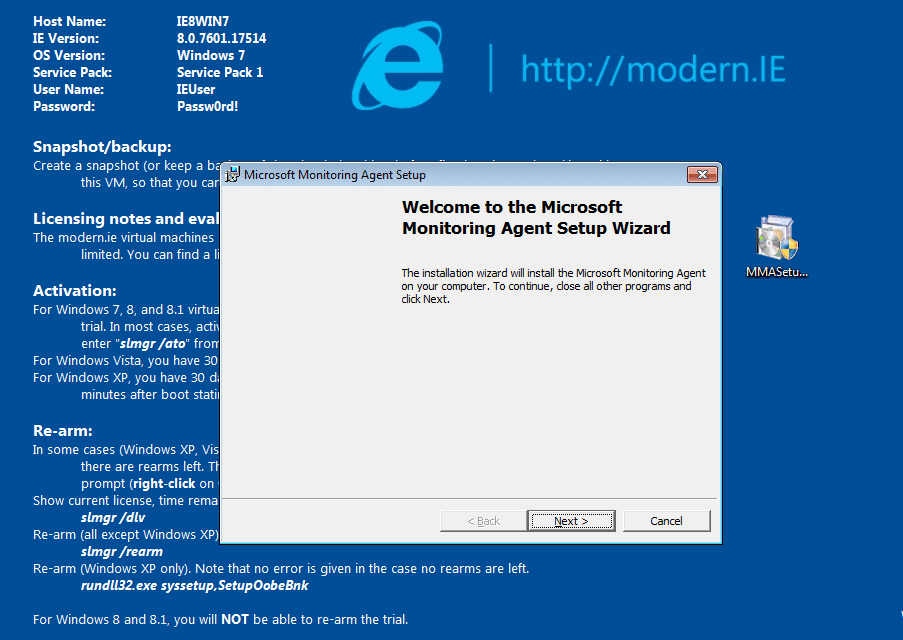
Open your Windows machine (in my case Windows 7 x32 ) and install the agent. Click Next
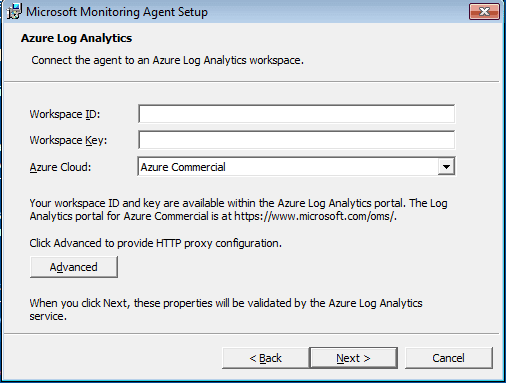
Add your ID and Key (You will find them in Windows servers dashboard )
Click Next and you are done
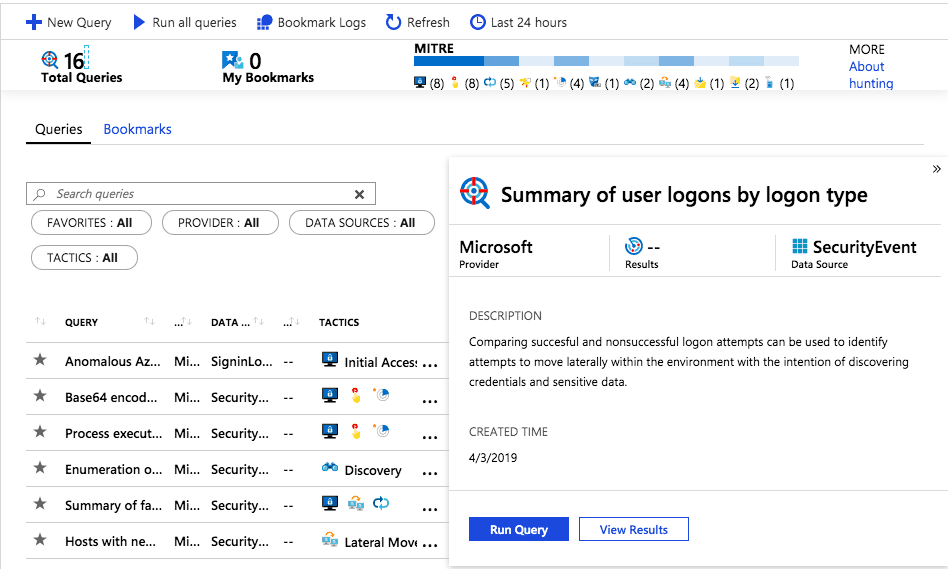
Now it is hunting time! Go to your Sentinel page and select Hunting and you will be able to type your own hunting queries using KQL Azure query language.
You can also use and create your own Notebooks
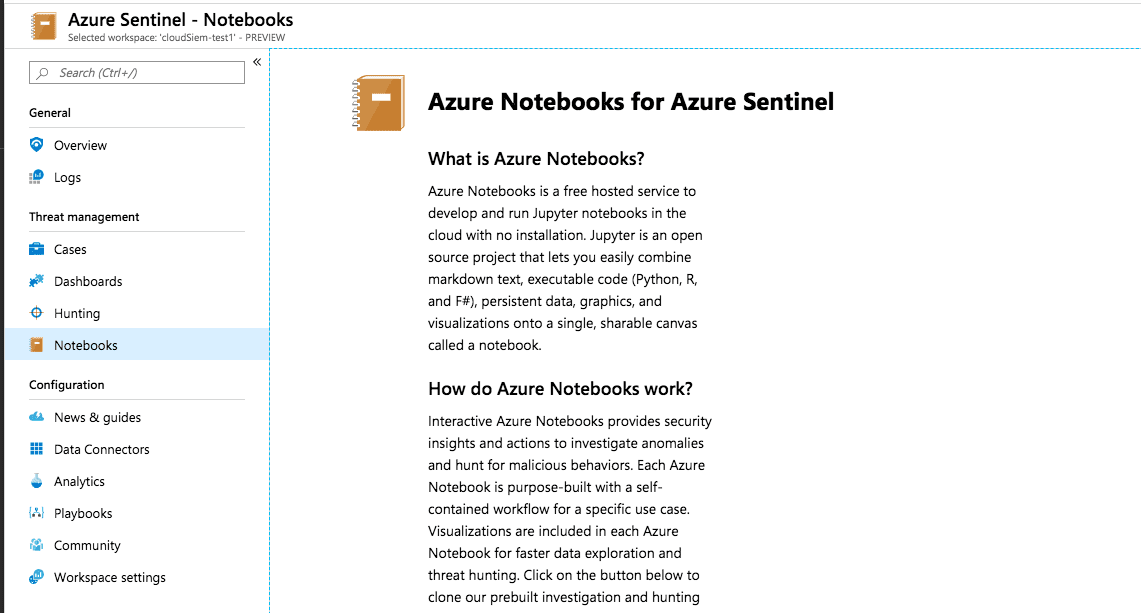
You can use some pre-made hunting notebooks delivered by Azure. Click Import
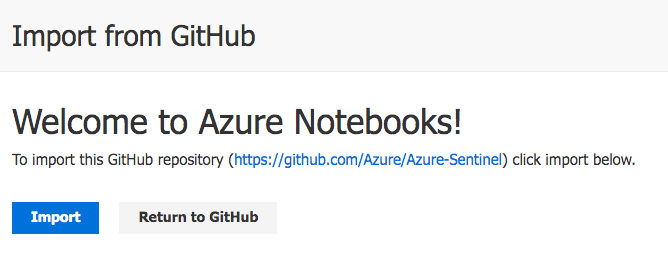
and you will upload them directly from the official Sentinel GitHub account:
The Sentinel dashboards are highly customizable. In other words, you add any visualisation you want. In this example i added a CPU visualization
You can even add your alert/detection rules. If you want to do so click "New alert rule"

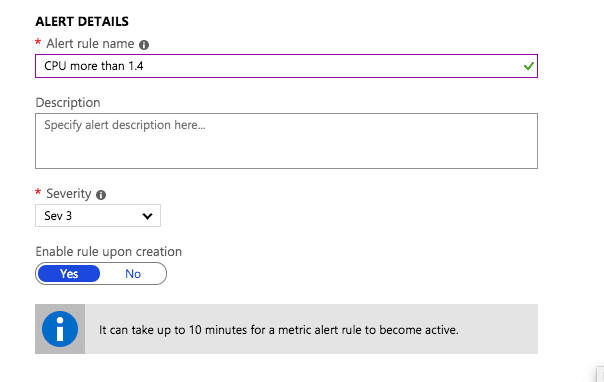
I tried an arbitrary condition for educational purposes CPU \> 1.4%
You can also select your action when the condition is performed. In my case, i tried the email notification option
You will receive a confirmation email to check that everything is ok:
When the rule is achieved you will receive an email notification

You can also write your own advanced detection queries with KQL. Go to " Hunting" and Click " New Query" and create your customized query and also you can identify its connection with MITRE ATT&CK framework.
By now you are ready to start your Hunting mission.
※ 출처 : Blue Teams Academy | www.blueteamsacademy.com/azure/
'OffSec' 카테고리의 다른 글
| [Blue Teams Academy] 모듈 6 - 위협 인텔리전스 기본 원리 (0) | 2021.03.18 |
|---|---|
| [Blue Teams Academy] 모듈 5 - HIDS(Hands-on Wazuh Host-based Intrusion Detection System) 배포 (0) | 2021.03.18 |
| [Blue Teams Academy] 모듈 3 - ELK(Elastic Stack) SIEM을 배포하는 방법 (2) | 2021.03.18 |
| [Blue Teams Academy] 모듈 2 - 모든 Blue Teamer가 갖춰야 하는 20가지 오픈 소스 도구 (0) | 2021.03.18 |
| [Blue Teams Academy] 모듈 1 - 사고 대응 및 보안 운영 기본 원리 (0) | 2021.03.18 |


댓글